


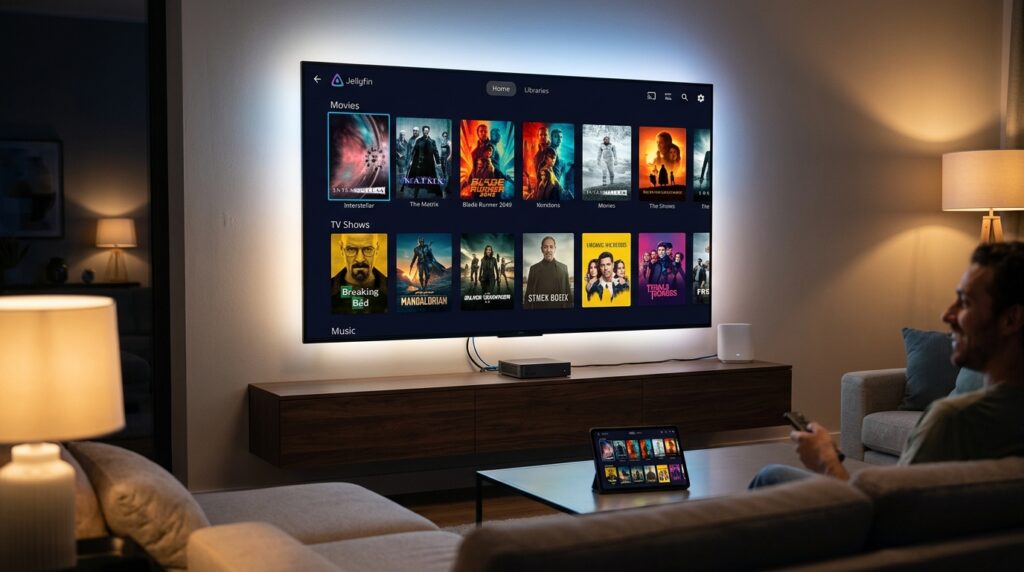
If you have an unused computer lying around, you can easily transform it into a high-performance home streaming center. Knowing how to set up a Jellyfin media server allows you to host your personal movies, TV shows, audiobooks, and music locally while streaming them smoothly to your smart TVs, smartphones, and tablets without paying any subscription fees.
In this beginner-friendly article, you will discover how to set up a Jellyfin media server step-by-step, organize your files correctly, configure system settings, and connect client devices across your network. If you are comparing streaming options, you can also check out our guide on PC vs Console vs Handheld Gaming Performance to optimize your home hardware setup.
Why Learn How to Set Up a Jellyfin Media Server
Before configuring software, it helps to understand why learning how to set up a Jellyfin media server gives you a superior home streaming environment compared to proprietary software solutions like Plex or Emby.
Jellyfin originated as an open-source project designed to provide full streaming functionality without hidden paywalls, commercial tracking, or mandatory internet logins.
- 100% Free and Open Source: Hardware decoding, offline sync, and mobile playback are completely free.
- Total Privacy Control: Your media files and viewing stats remain entirely on your local home network.
- No Cloud Server Dependencies: Even if your ISP connection goes down, your home streaming continues without disruption.
- Broad Device Support: Client applications are available for Android TV, Amazon Firestick, Apple TV, iOS, Android, and web browsers.
Prerequisites to How to Set Up a Jellyfin Media Server
| System Component | Minimum Requirement | Recommended Specification |
| Operating System | Windows 10/11 (64-bit) or Linux | Windows 11 or Linux Ubuntu |
| Processor (CPU) | Dual-Core Intel / AMD Processor | Intel 8th Gen+ Core i3/i5 with QuickSync |
| Memory (RAM) | 4 GB RAM | 8 GB DDR4 RAM |
| Network Interface | Fast Ethernet | 1 Gbps Wired Ethernet Cable |
| Storage Space | 256 GB SSD for OS | 1 TB+ Hard Disk Drive (HDD) |
Step 1: Prepare Directories to How to Set Up a Jellyfin Media Server
Organizing your folders cleanly is an essential first phase when learning how to set up a Jellyfin media server. Automated metadata scrapers need consistent file structures to automatically download movie covers and show information.
1.Create Master Media Folders:
Navigate to your main hard drive and create a folder named JellyfinMedia. Inside it, set up subfolders for each media type:
D:\JellyfinMedia\MoviesD:\JellyfinMedia\TV ShowsD:\JellyfinMedia\Music
2.Rename Media Files Standardly:
Apply standard naming conventions to ensure metadata scrapes accurately:
- Movies:
Movie Title (Year).mp4(Example:Inception (2010).mkv) - TV Shows:
Show Name > Season 01 > Show Name - S01E01.mp4
3.Adjust Power Management Options:
Prevent your computer from entering sleep mode while streaming media:
- Open Settings > System > Power & battery.
- Change Sleep settings to Never when plugged in.
- Connect your computer to your network router using an Ethernet cable.
Step 2: Install Software to How to Set Up a Jellyfin Media Server
Follow these steps to download and run the core server application on your Windows machine as you learn how to set up a Jellyfin media server.
Downloading the Core Server Executable
- Visit the official Jellyfin Downloads Page.
- Download the latest stable Windows x64 Installer build.
- Open the downloaded executable file to launch the setup installer.
- When prompted, choose Install as a Service. This ensures the server starts automatically in the background whenever your PC boots up.
- Click Next through default directory selections, then click Finish.
Step 3: Run Startup Wizard to How to Set Up a Jellyfin Media Server
With the application running, complete the setup wizard in your web browser as part of how to set up a Jellyfin media server.
1.Open Web Dashboard Interface:
Launch Chrome, Edge, or Firefox on your computer and navigate to: http://localhost:8096.
2.Create Admin Account Credentials:
Select your preferred display language, then enter an administrator username and a strong password.
3.Add Media Folder Path:
Click Add Media Library:
- Choose Content Type (e.g., Movies).
- Click the
+sign next to Folders and browse toD:\JellyfinMedia\Movies. - Keep default scrapers enabled and click OK.
- Repeat these steps for your TV Shows library folder.
4.Enable Network Settings:
Check Enable automatic port mapping (UPnP) to complete the initial setup wizard.
Step 4: Link Client Apps to How to Set Up a Jellyfin Media Server
After configuring the host system, connect external screens in your house to complete how to set up a Jellyfin media server.
Locating Your Local Host IP Address
- Press Win + R, type
cmd, and press Enter. - Type
ipconfiginto the terminal window and hit Enter. - Locate your active network connection and record the IPv4 Address (e.g.,
192.168.1.50).
Connecting Smart TVs and Phones
- Open the app store on your Android TV, Firestick, Roku, or mobile device.
- Search for and install the free Jellyfin client app.
- Launch the app and select Add Server.
- Type your server’s IP address along with port
8096:Plaintexthttp://192.168.1.50:8096 - Log in with your admin credentials to start watching immediately.
Performance Tweaks to How to Set Up a Jellyfin Media Server
To prevent video lag and stuttering, enable hardware transcoding settings when learning how to set up a Jellyfin media server. For further media system optimization, check out our tutorial on Android Photo Recovery and Media Storage Management.
- Go to your Jellyfin Web Dashboard and click Administration > Dashboard.
- Click Playback on the left menu sidebar.
- Open the Hardware acceleration dropdown:
- Choose Intel QuickSync for Intel processors.
- Choose Nvidia NVENC for dedicated GeForce graphics cards.
- Choose AMF for AMD graphics hardware.
- Check video formats supported by your card (H.264, HEVC, VP9, AV1).
- Click Save at the bottom.
Final Verdict on How to Set Up a Jellyfin Media Server
Learning how to set up a Jellyfin media server is one of the most rewarding home tech projects you can undertake. By turning unused hardware into a dedicated, self-hosted media server, you gain complete freedom over your digital collection without recurring costs or privacy compromises.
Whether you want to stream high-definition movies to your living room TV or share music across your home, following these steps ensures a smooth, highly reliable streaming setup.
Comparison Table Jellyfin vs Plex vs Emby
| Feature / Metric | Jellyfin Media Server | Plex Media Server | Emby Server |
| Pricing Model | 100% Free & Open Source | Freemium (Plex Pass Required) | Freemium (Emby Premiere Required) |
| Hardware Transcoding | Free Out of the Box | Paid Feature | Paid Feature |
| Data Privacy | Completely Private (Local) | Phoning Home / Central Logins | Partial Central Logins |
| Offline Downloading | Free Feature | Paid Feature | Paid Feature |
| Setup Difficulty | Moderate | Very Easy | Easy |
| Best For | Privacy & Self-Hosted Enthusiasts | Beginners & Remote Sharing | Moderate Power Users |